1 of 7
Start by clicking the drop down arrow by the Add Users button and select Bulk Import Users

You're well on your way! Click Next for the next step.
2 of 7
Choose the way that you want to import the data into your project or event. If you choose to import a spreadsheet (accepted file types: .clsx, .xls, .csv, .ods) from your computer, click Select a file. If you are wanting to copy and paste data from a spreadsheet or csv, click Get Started. Also note, this is a template available for download.

3 of 7
Skip if Selecting a File
You will then get this field below. You must have a Display Name, Email, and User Level for your import (optional fields can be found here). Copy and paste the data into the area and then click Start My Import.

4 of 7
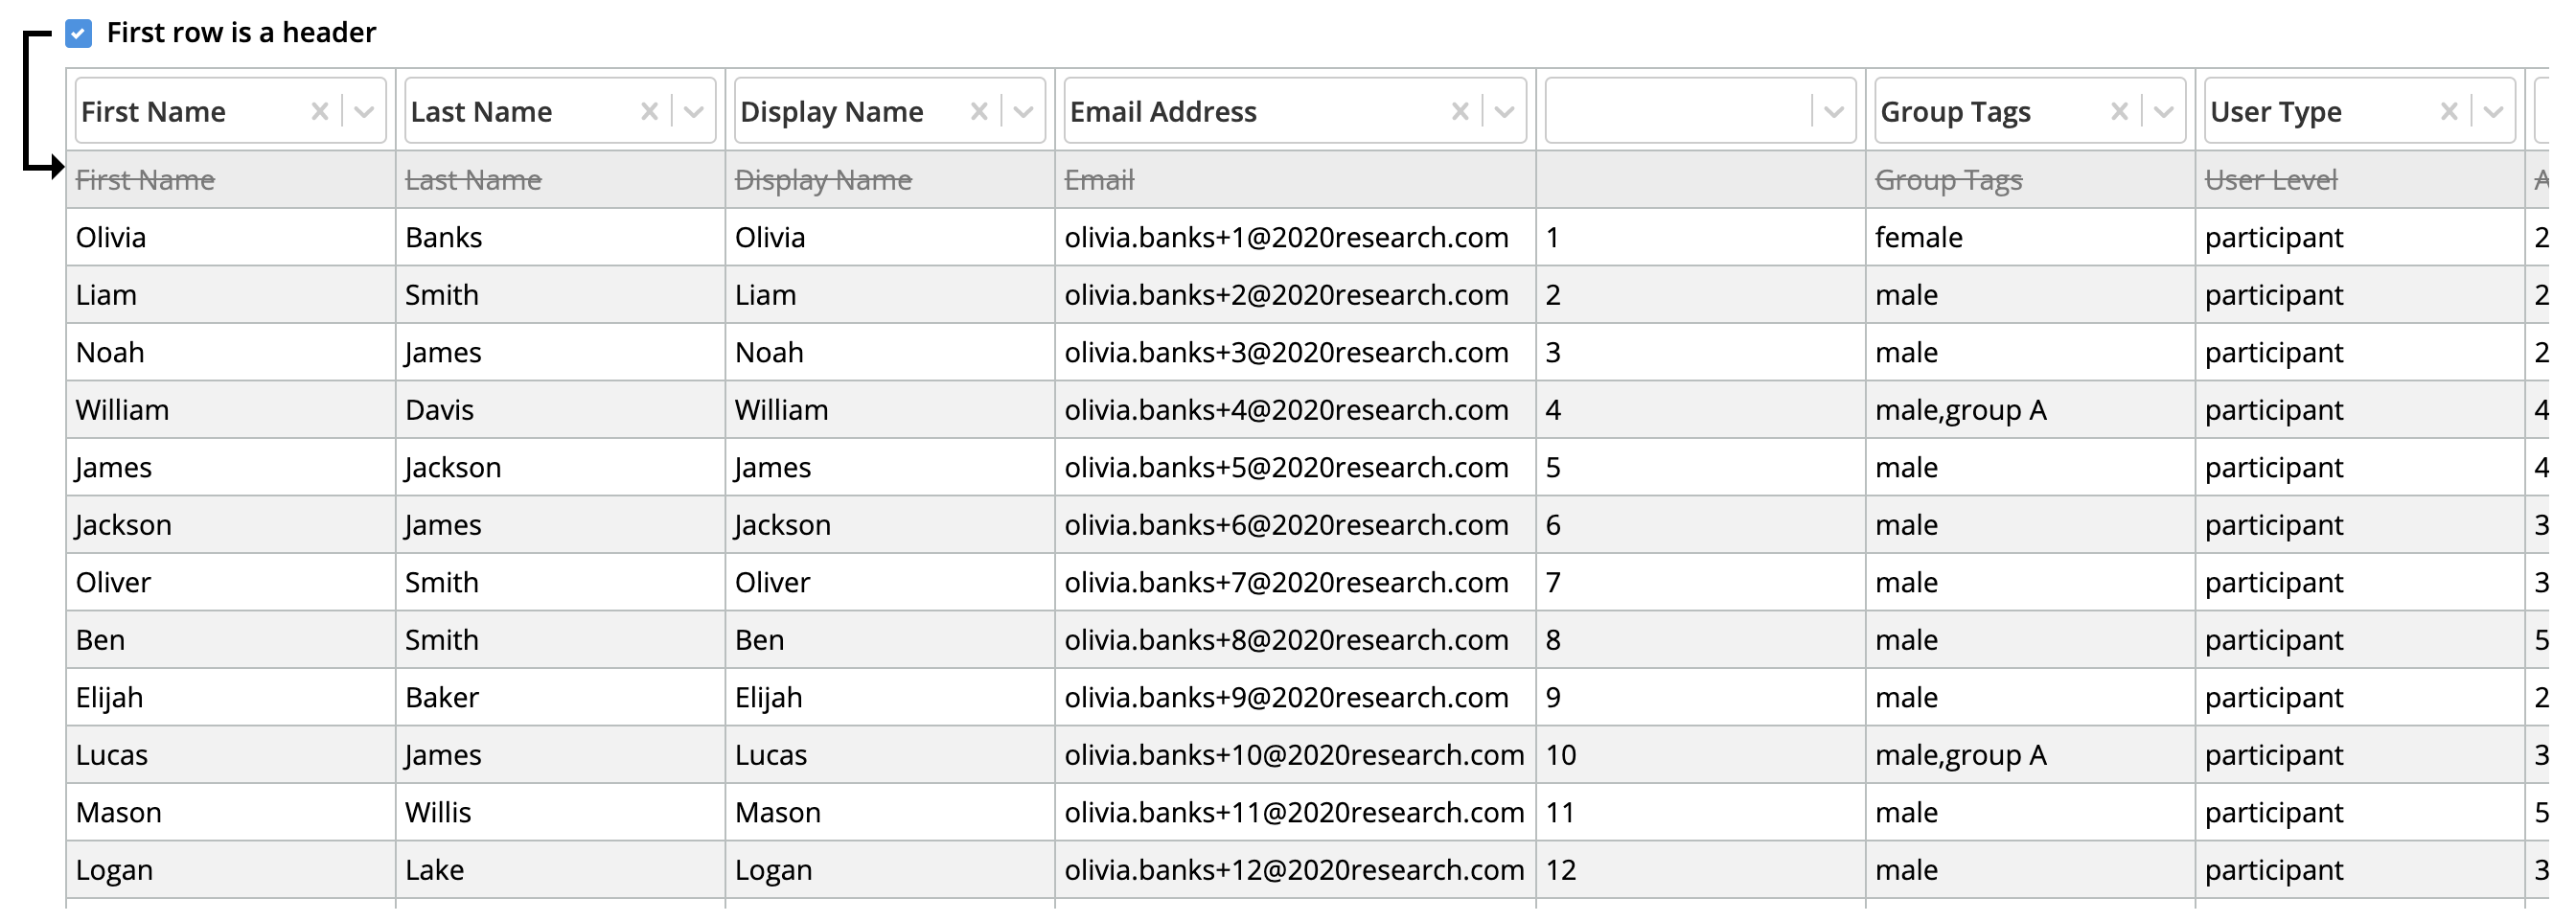
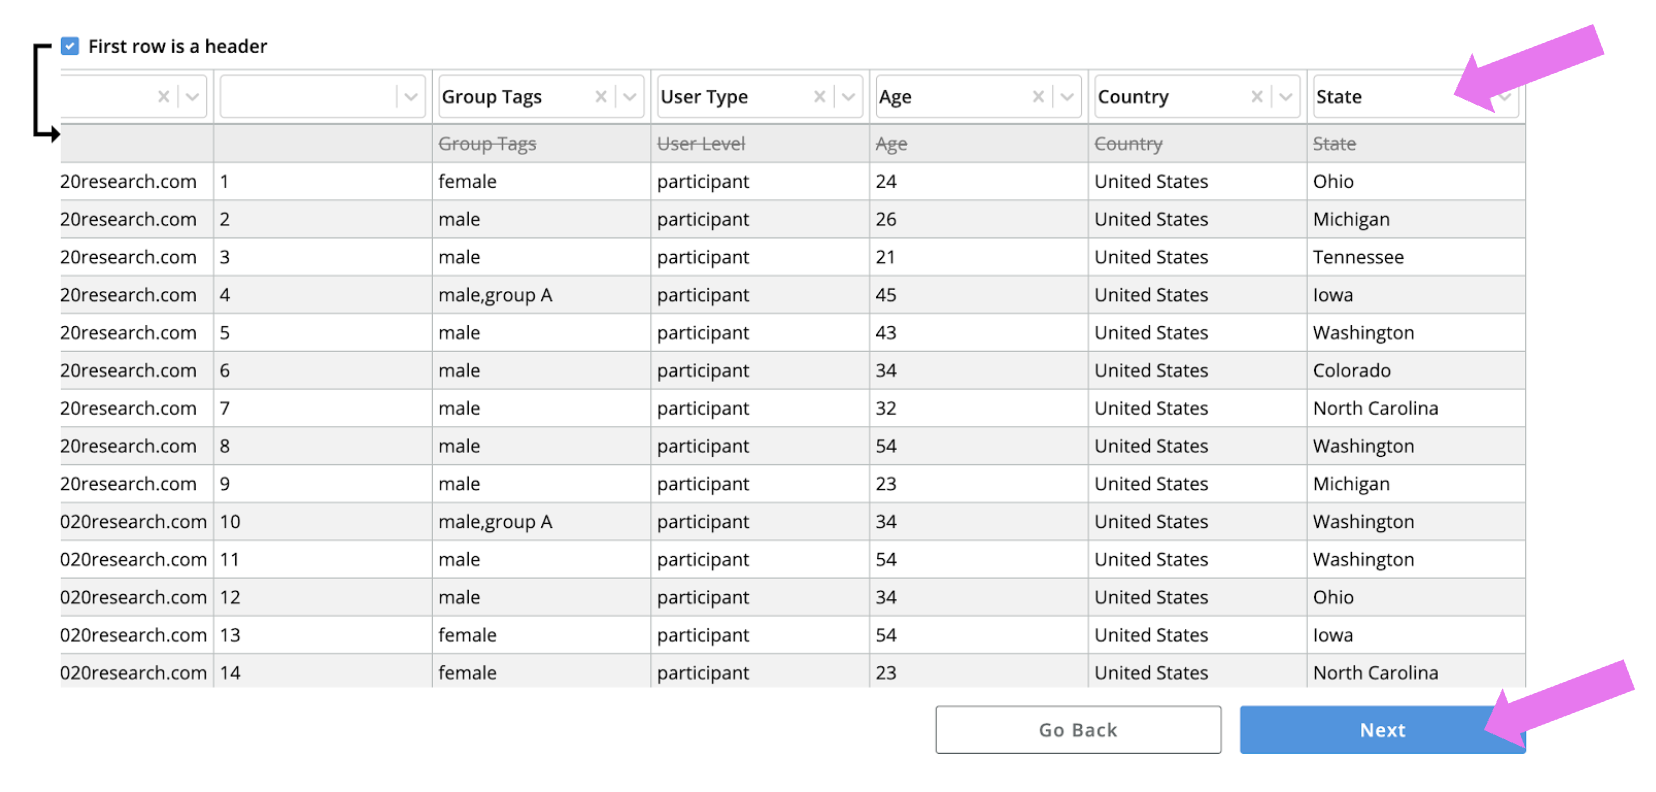
Review the information that you have uploaded. If you have a header row in the imported text, be sure the First row is a header box is checked. Make sure all of the columns are properly labeled. Note: the document will not import if you do not have a Display Name, Email, and User Level. When you are done, click Preview Changes.

5 of 7
You can add profile fields by typing the name of the field into the text box at the top of column. Once you're ready, click "Next".

6 of 7
You need to define each profile fields by their type. You can select the type by using the drop down menu. Once you've defined types for all of your profile fields, click "Next".

7 of 7
Evaluate the summary of your changes and make sure that it appears that your data is correct. If everything looks right, click Finish. If everything is right, then you will get a Success screen. If there is an issue, please reach out to support@qualboard.com
If you are adding users from the project level, be sure to add them to the event as well so that they can participate in the study!
