1 of 13
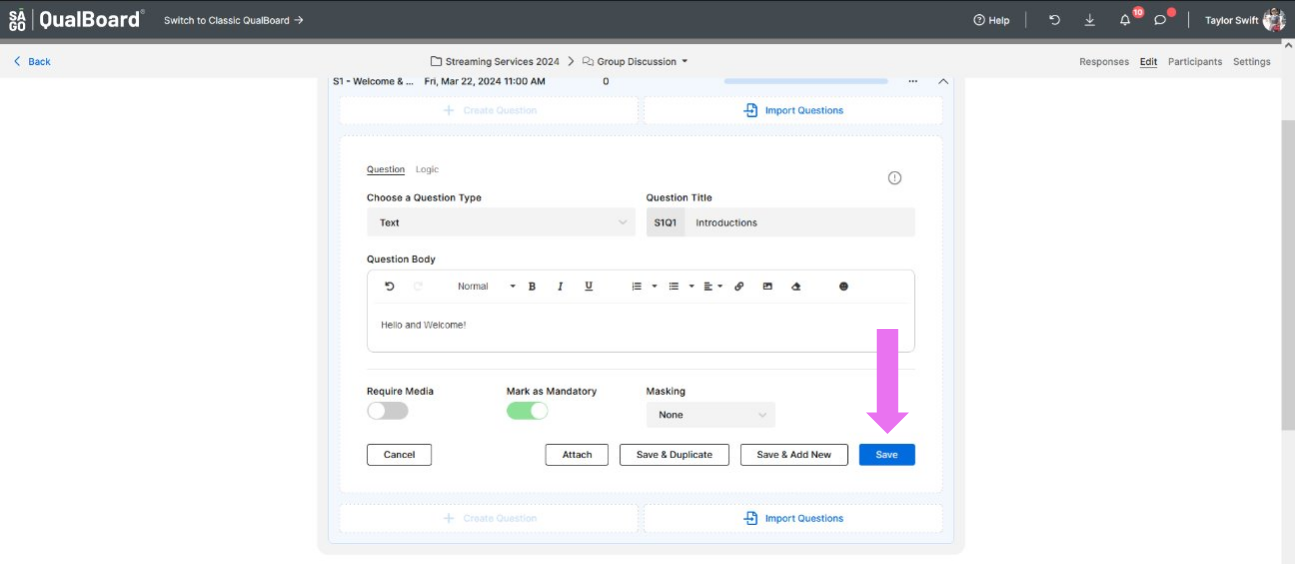
From the Project Dashboard, click the Create Event button
You're well on your way! Click Next for the next step.
2 of 13
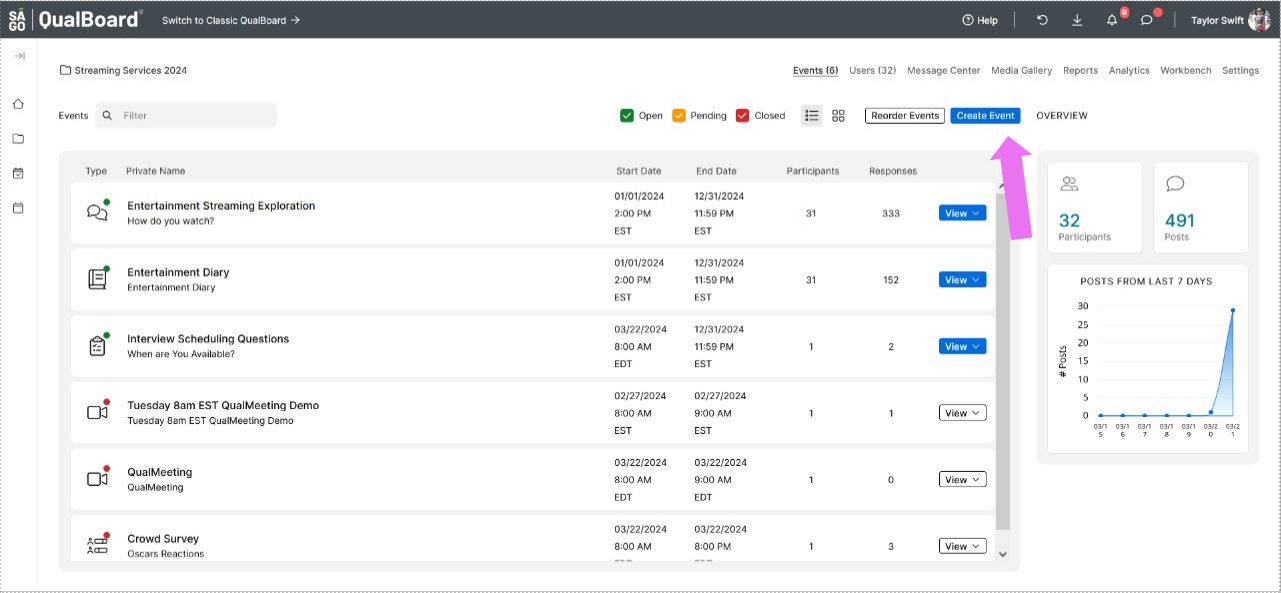
Select the box labeled Group Discussion.
3 of 13
Next you will give your event a Public and Private Name. The Public Name can be viewed by any user. The Private name is not visible to respondents. Select the timezone that the project's open and close dates will be based off of. Finally click Create Event.

4 of 13
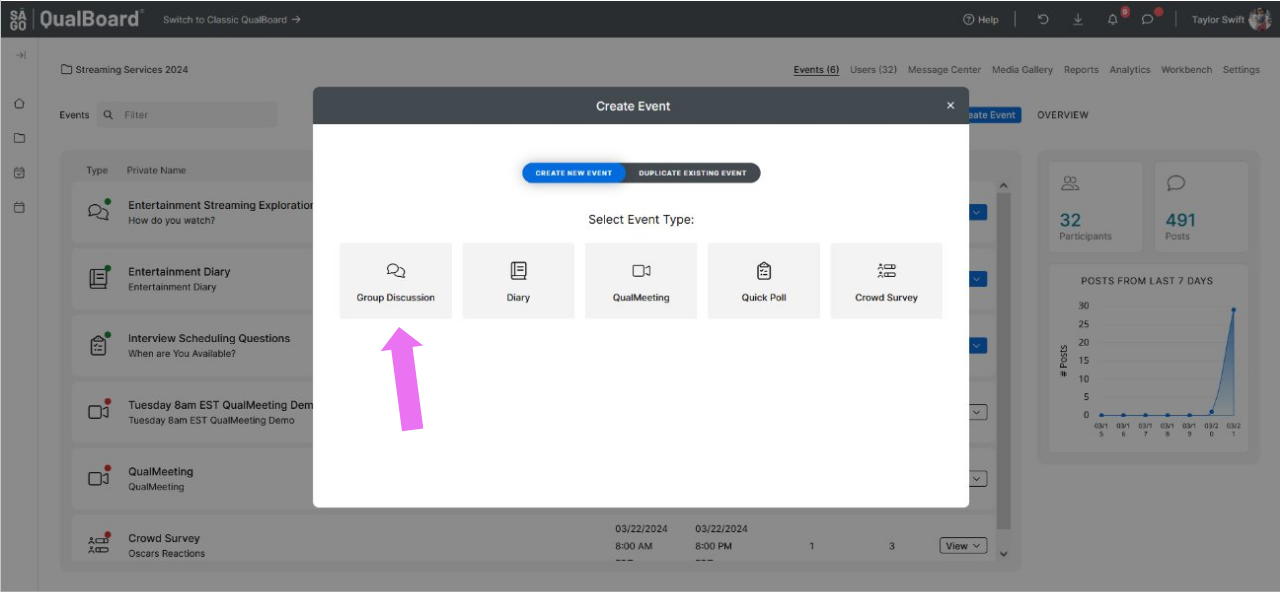
Click View and then Responses, or the Event's Name, to enter the event and begin setting everything up! Alternatively, you can jump into the Edit, Participants, or Settings tab of the event from this menu.

5 of 13
You'll need to be in the Edit tab to begin adding questions for the respondents to complete.
6 of 13
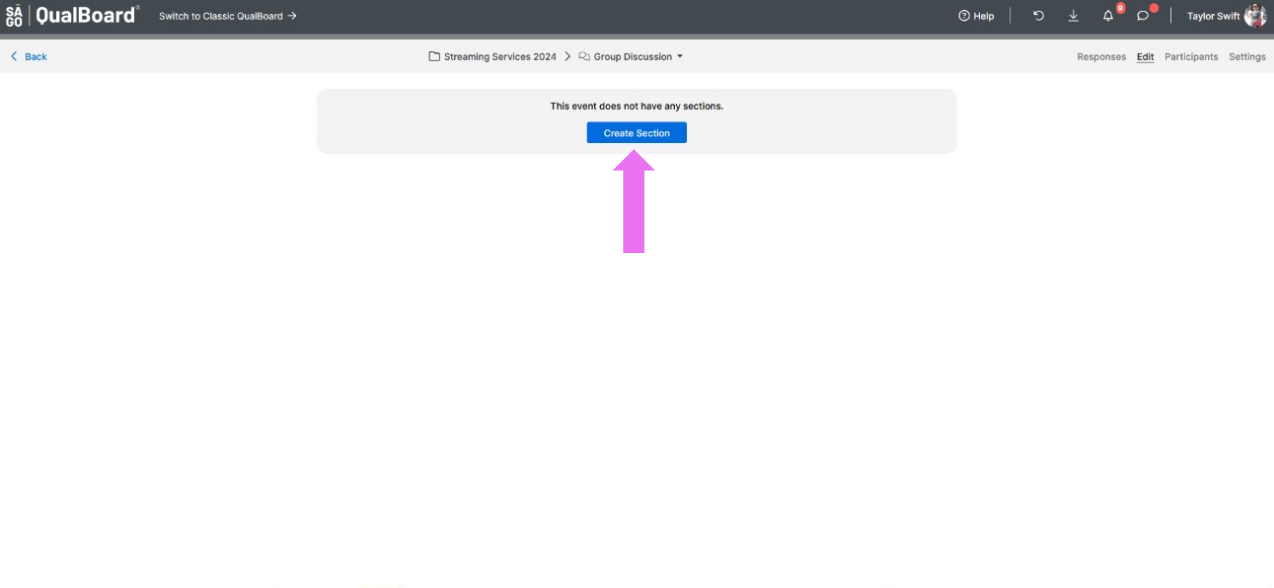
Click New Section to begin setting up your sections. Sections are containers of questions that open at specific times and have a defined order.
7 of 13
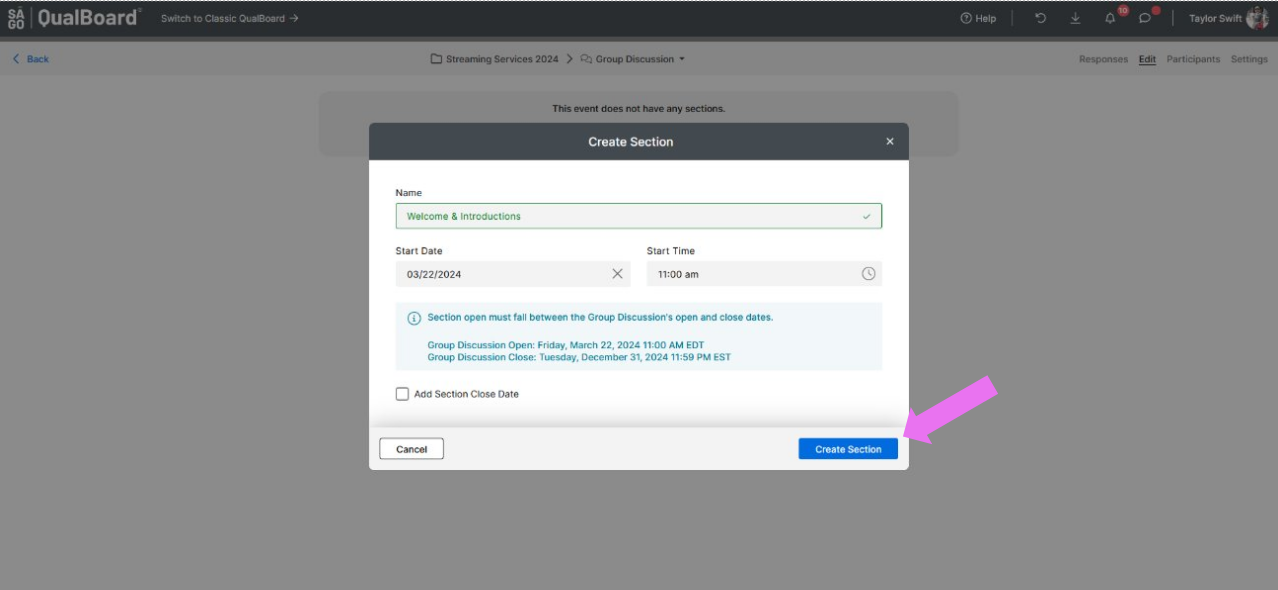
You can give your section a name that will be seen by participants. You also will set the open time when the questions in this section will become available to respondents. When you are finished, click Create Section.
8 of 13
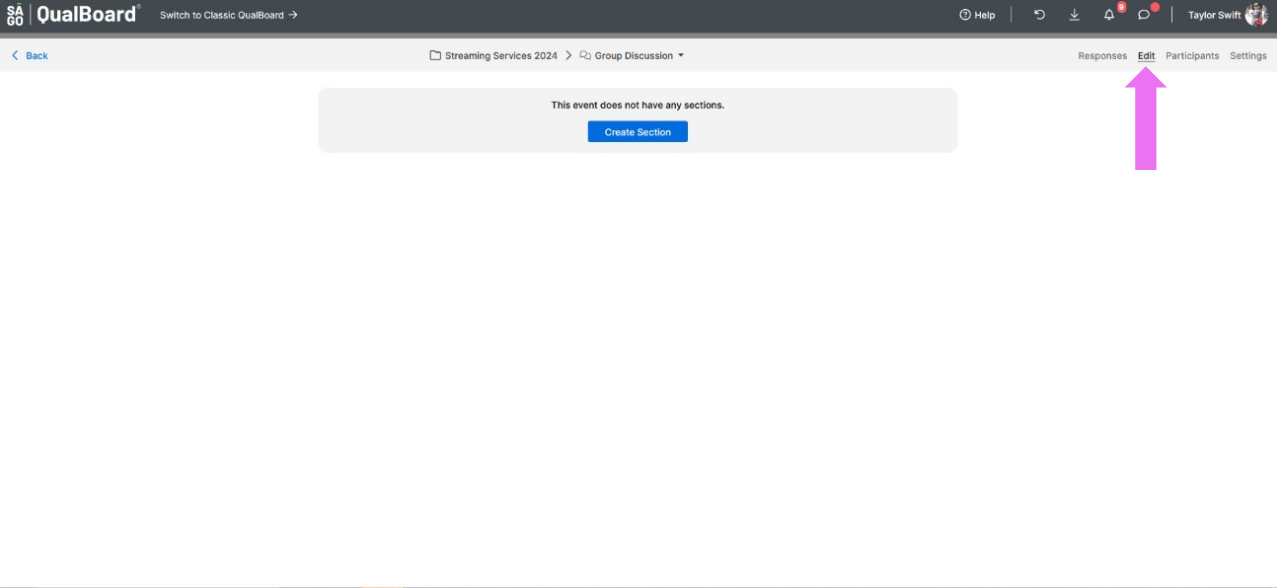
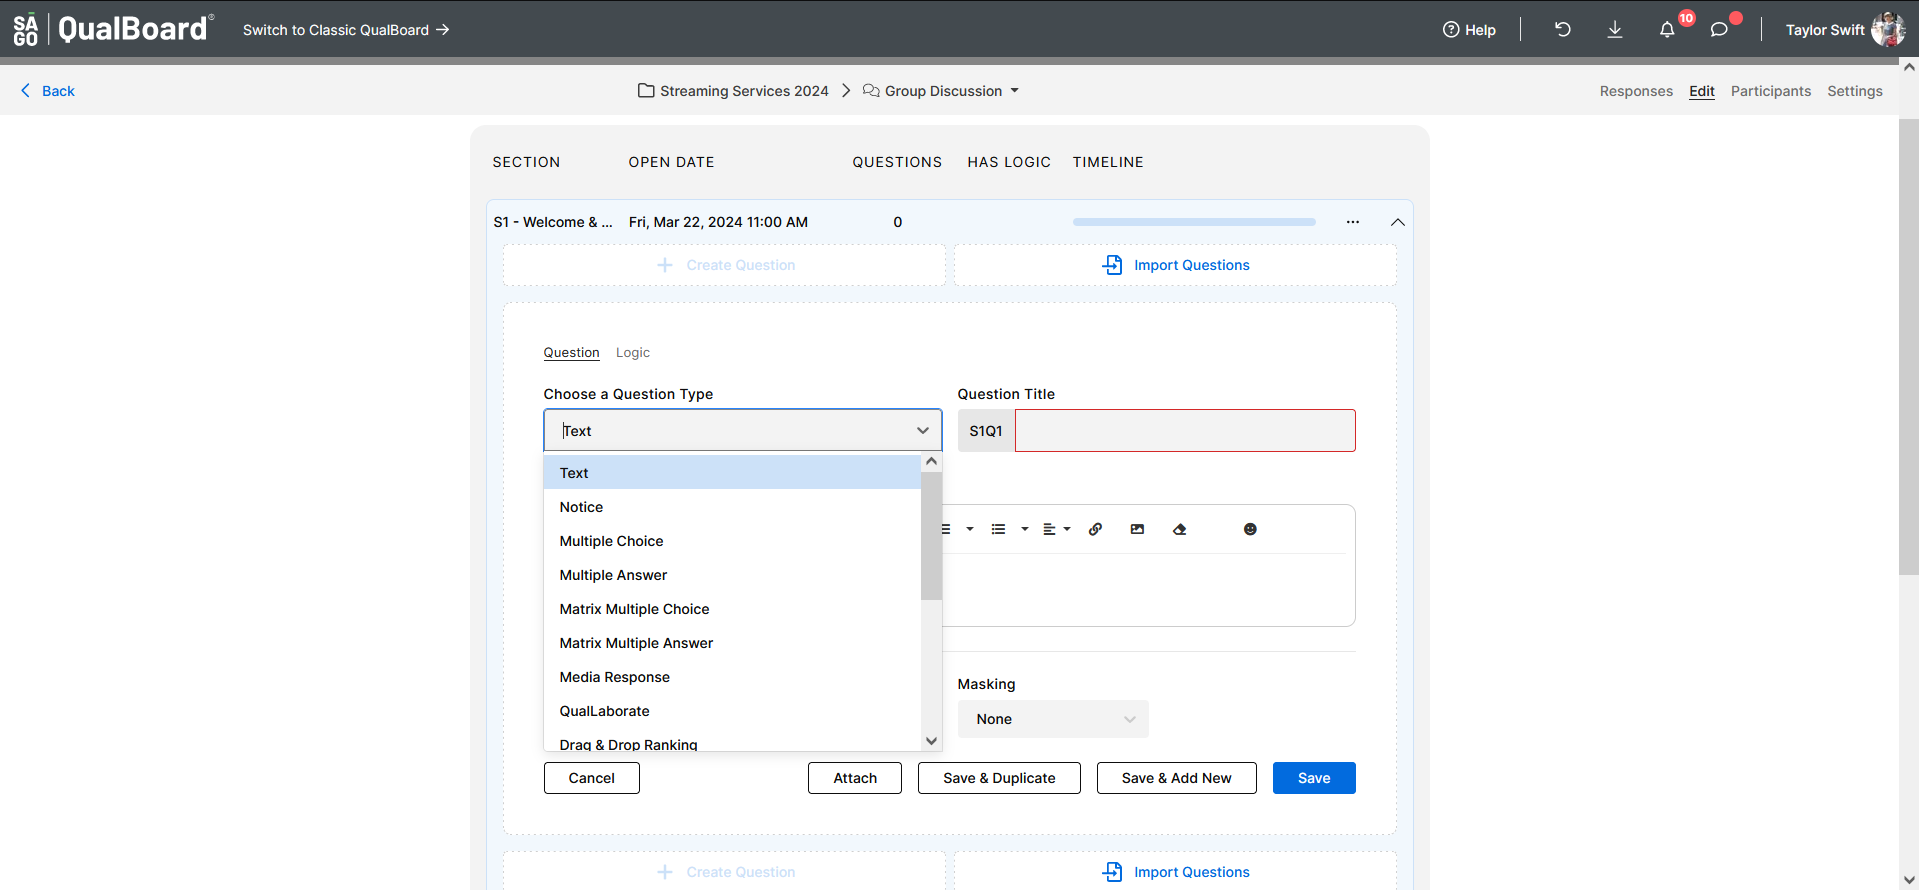
First, click on the section you would like to edit. Then click + Create Question. Click the drop-down and select the question type.
9 of 13
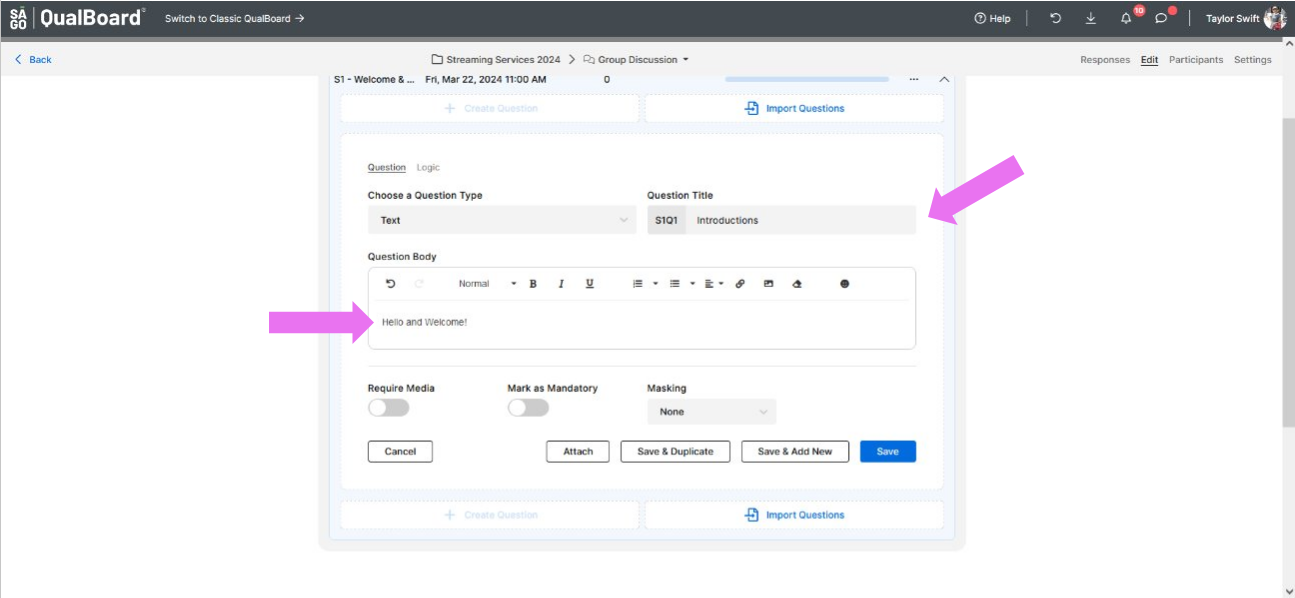
The first text box is the task title to identify the question (this is visible to the respondents). The second box is the area for you to put the instructions for the task for the respondent to complete.
10 of 13
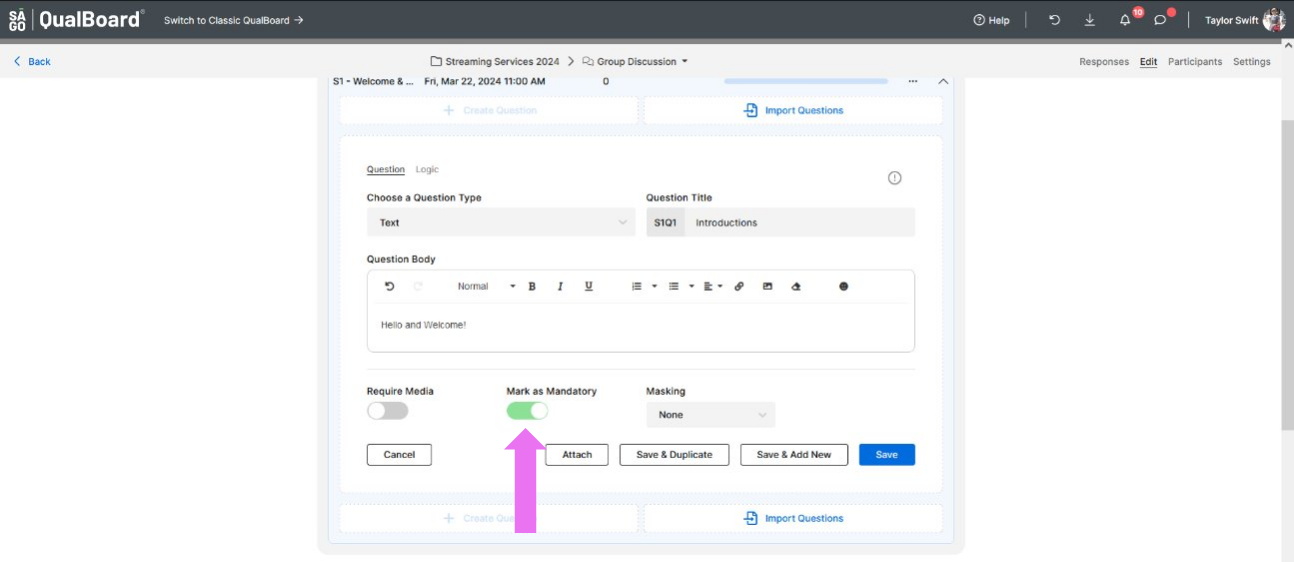
Below the task body, you will see question settings that vary depending on the question type (i.e. Require Media). If these are green, it means that they are applied to the question. If you want to require a response, click Mark as Mandatory.
11 of 13
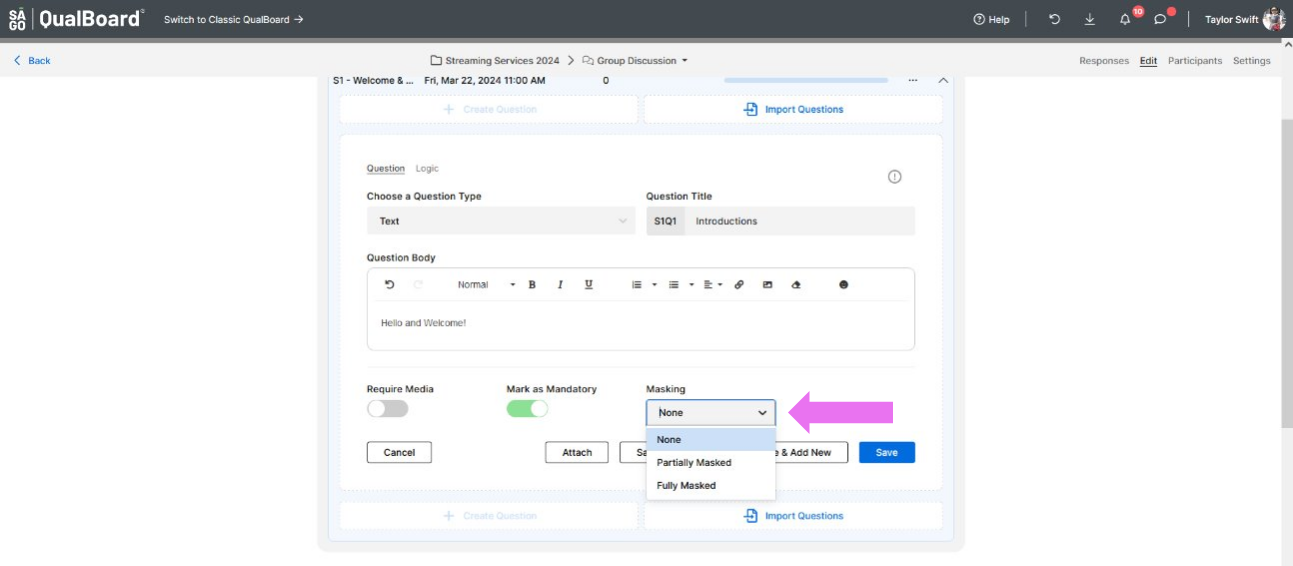
Masking determines how participants can see each other's responses. If there is no masking participants can always see each other's posts. Partial masking means a participant has to answer the question first before seeing anyone else's response. Fully masked keeps participants from ever seeing another participant's answer.
12 of 13
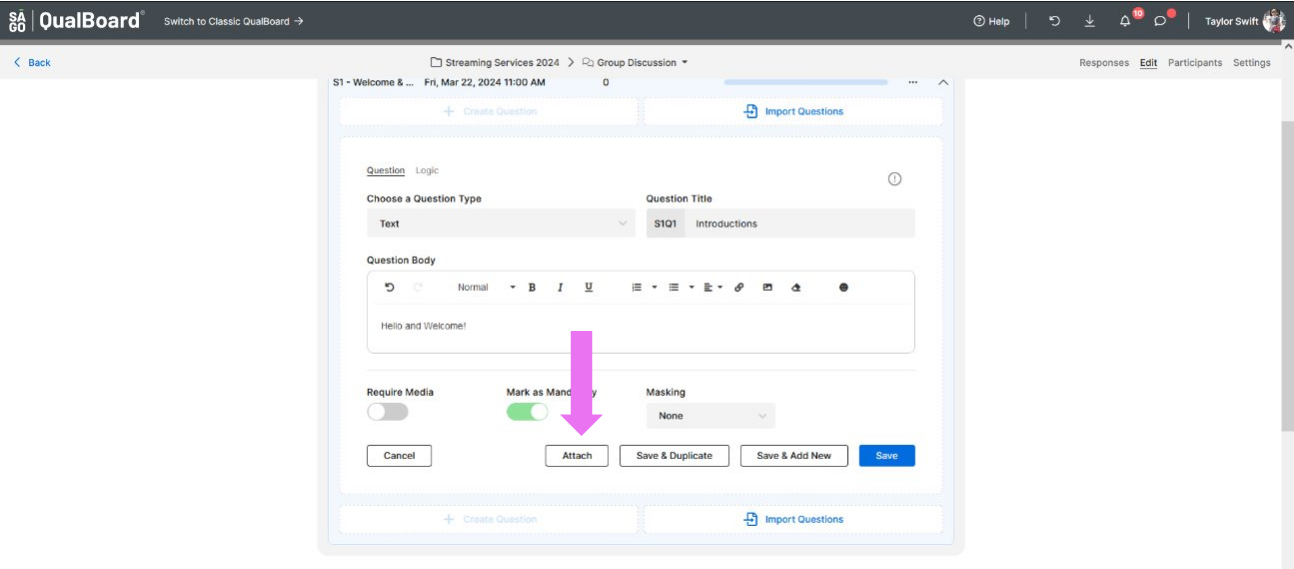
You can click the Attach button to add media to your task for respondents. To see a list of accepted media, go here.
13 of 13
Click Save, and that's it! You've made your first question!
